How to set everything up
Getting live takes three things working together: your algo on TradingView, a bridge, and a webhook alert that ties them to your broker. Follow the steps in order and you'll be trading on autopilot in about 15 minutes.
Confirm your algo access
Right after checkout we grant your TradingView username access to the strategy — there's nothing to download or copy-paste. It simply appears in your account.
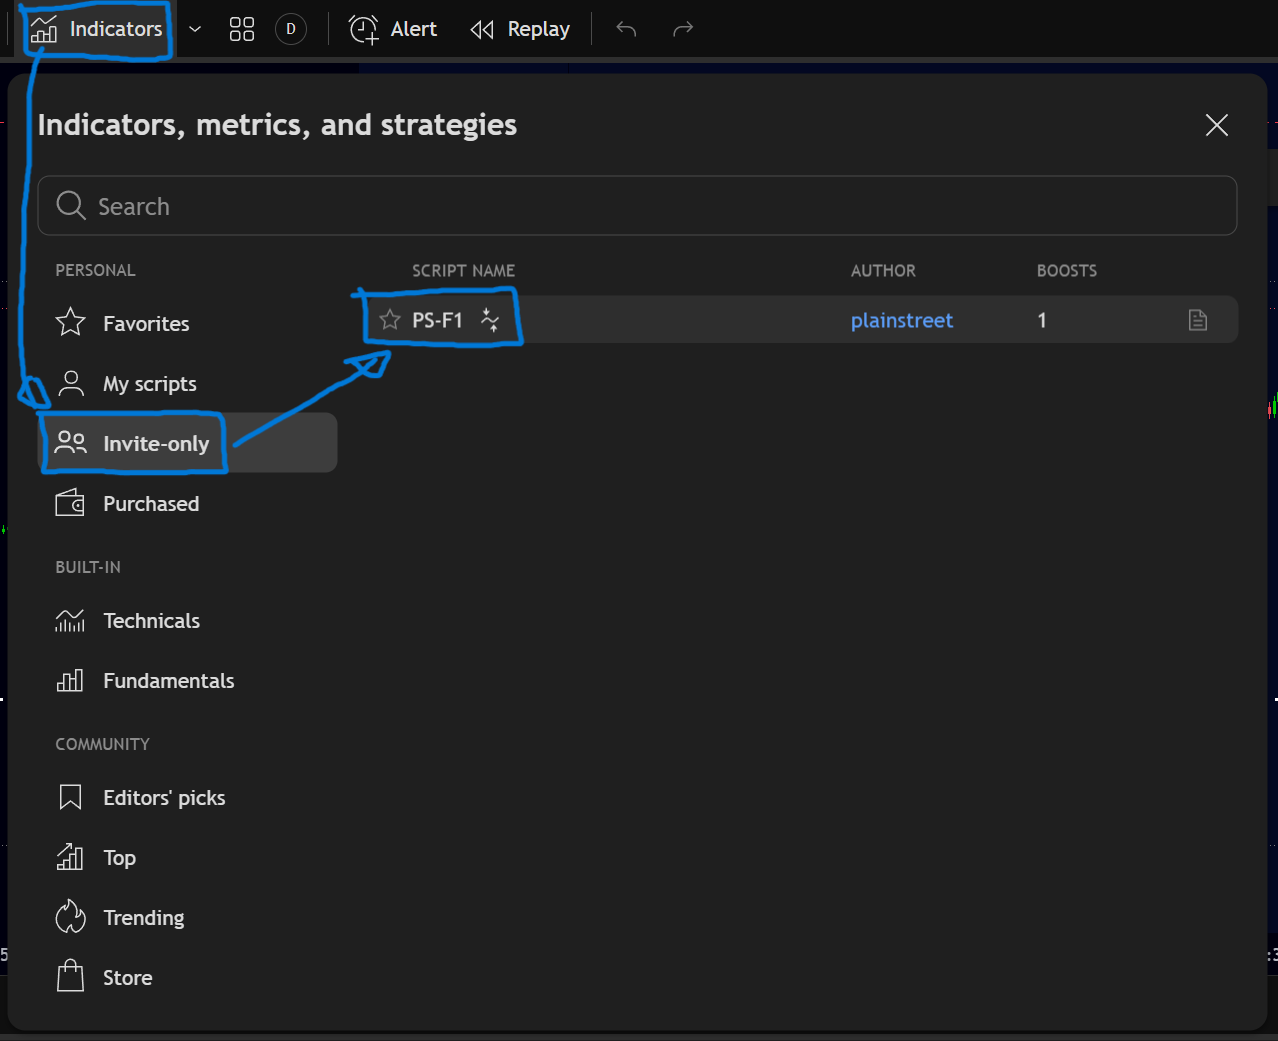
Within 15 minutes of purchase, your strategy shows up under Invite-only scripts in the TradingView Indicators window. To load it onto a chart:
- Open any chart and click Indicators in the top toolbar.
- Select the Invite-only scripts tab.
- Click your strategy (e.g. PS-F1) to add it to the chart.
Set up your bridge
TradingView generates the signal; your broker executes the trade. A bridge is the service that sits in between — it receives each TradingView alert and turns it into a real order on your account. Pick one of the two below. Both are fully supported.
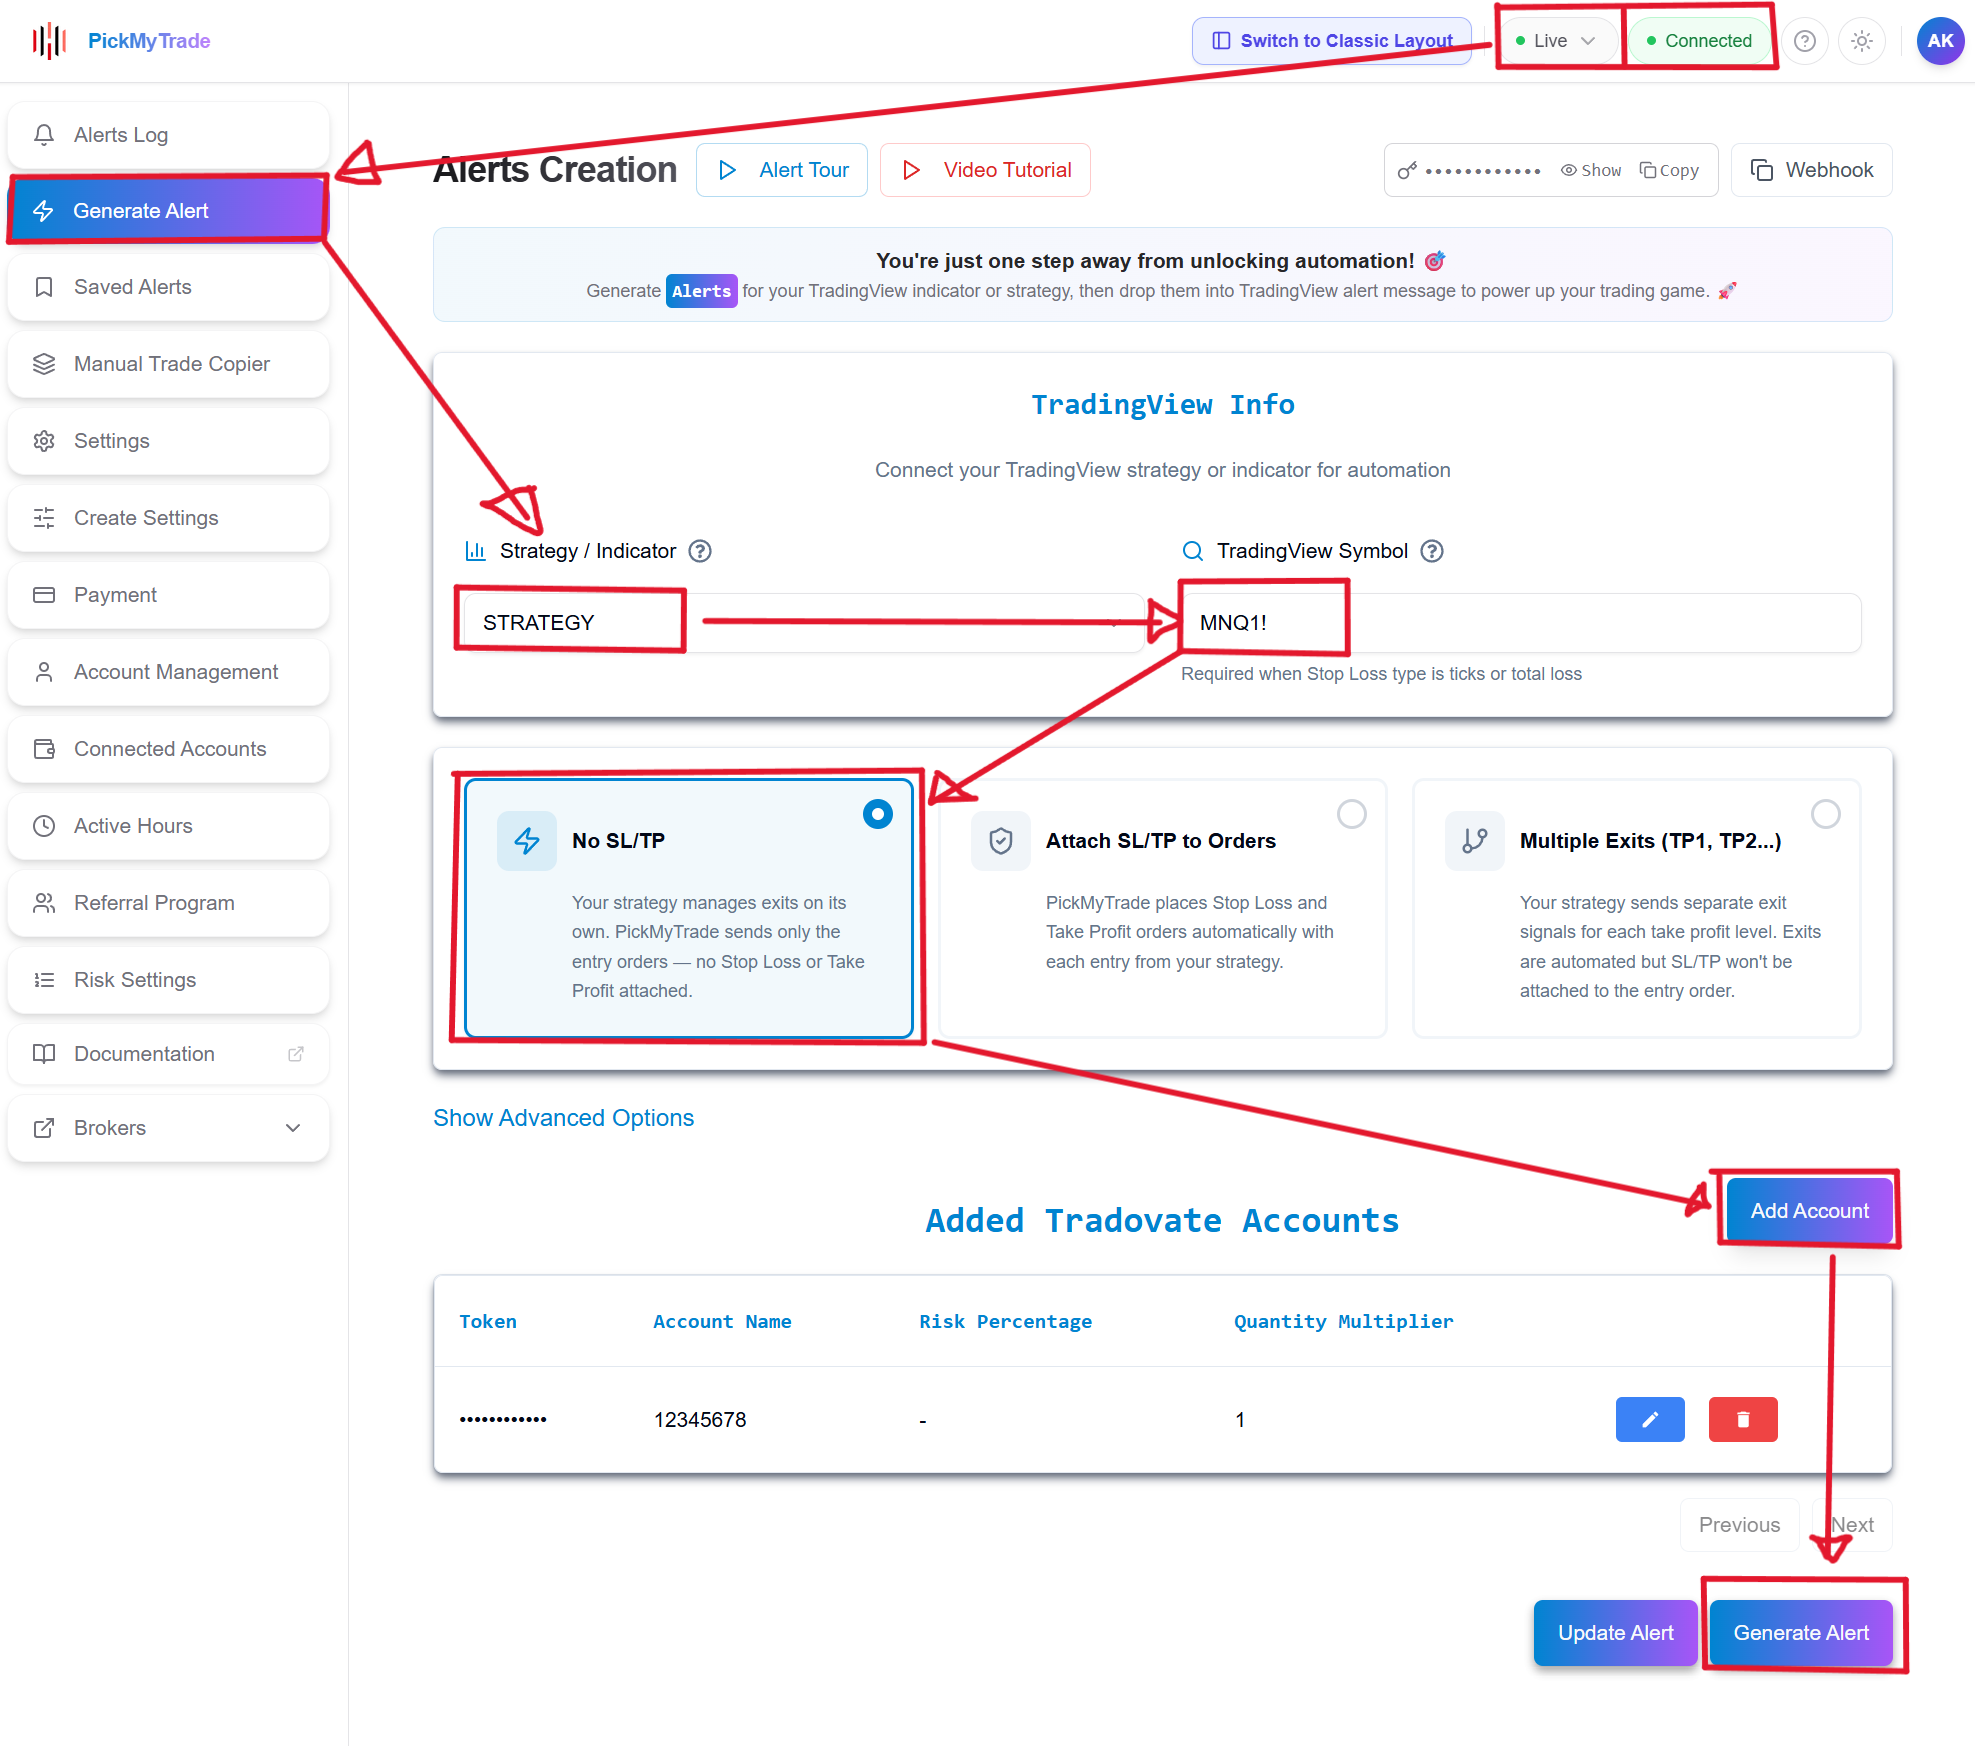
- Create your PickMyTrade account and log in.
- Go to Add Account and connect your broker or prop account (Tradovate, Rithmic, etc.). Follow the on-screen broker login to authorize it. When asked for the connection type, pick Demo for prop-firm and funded accounts — they run on demo infrastructure even though the payouts are real — and Live only for a real-money personal account.
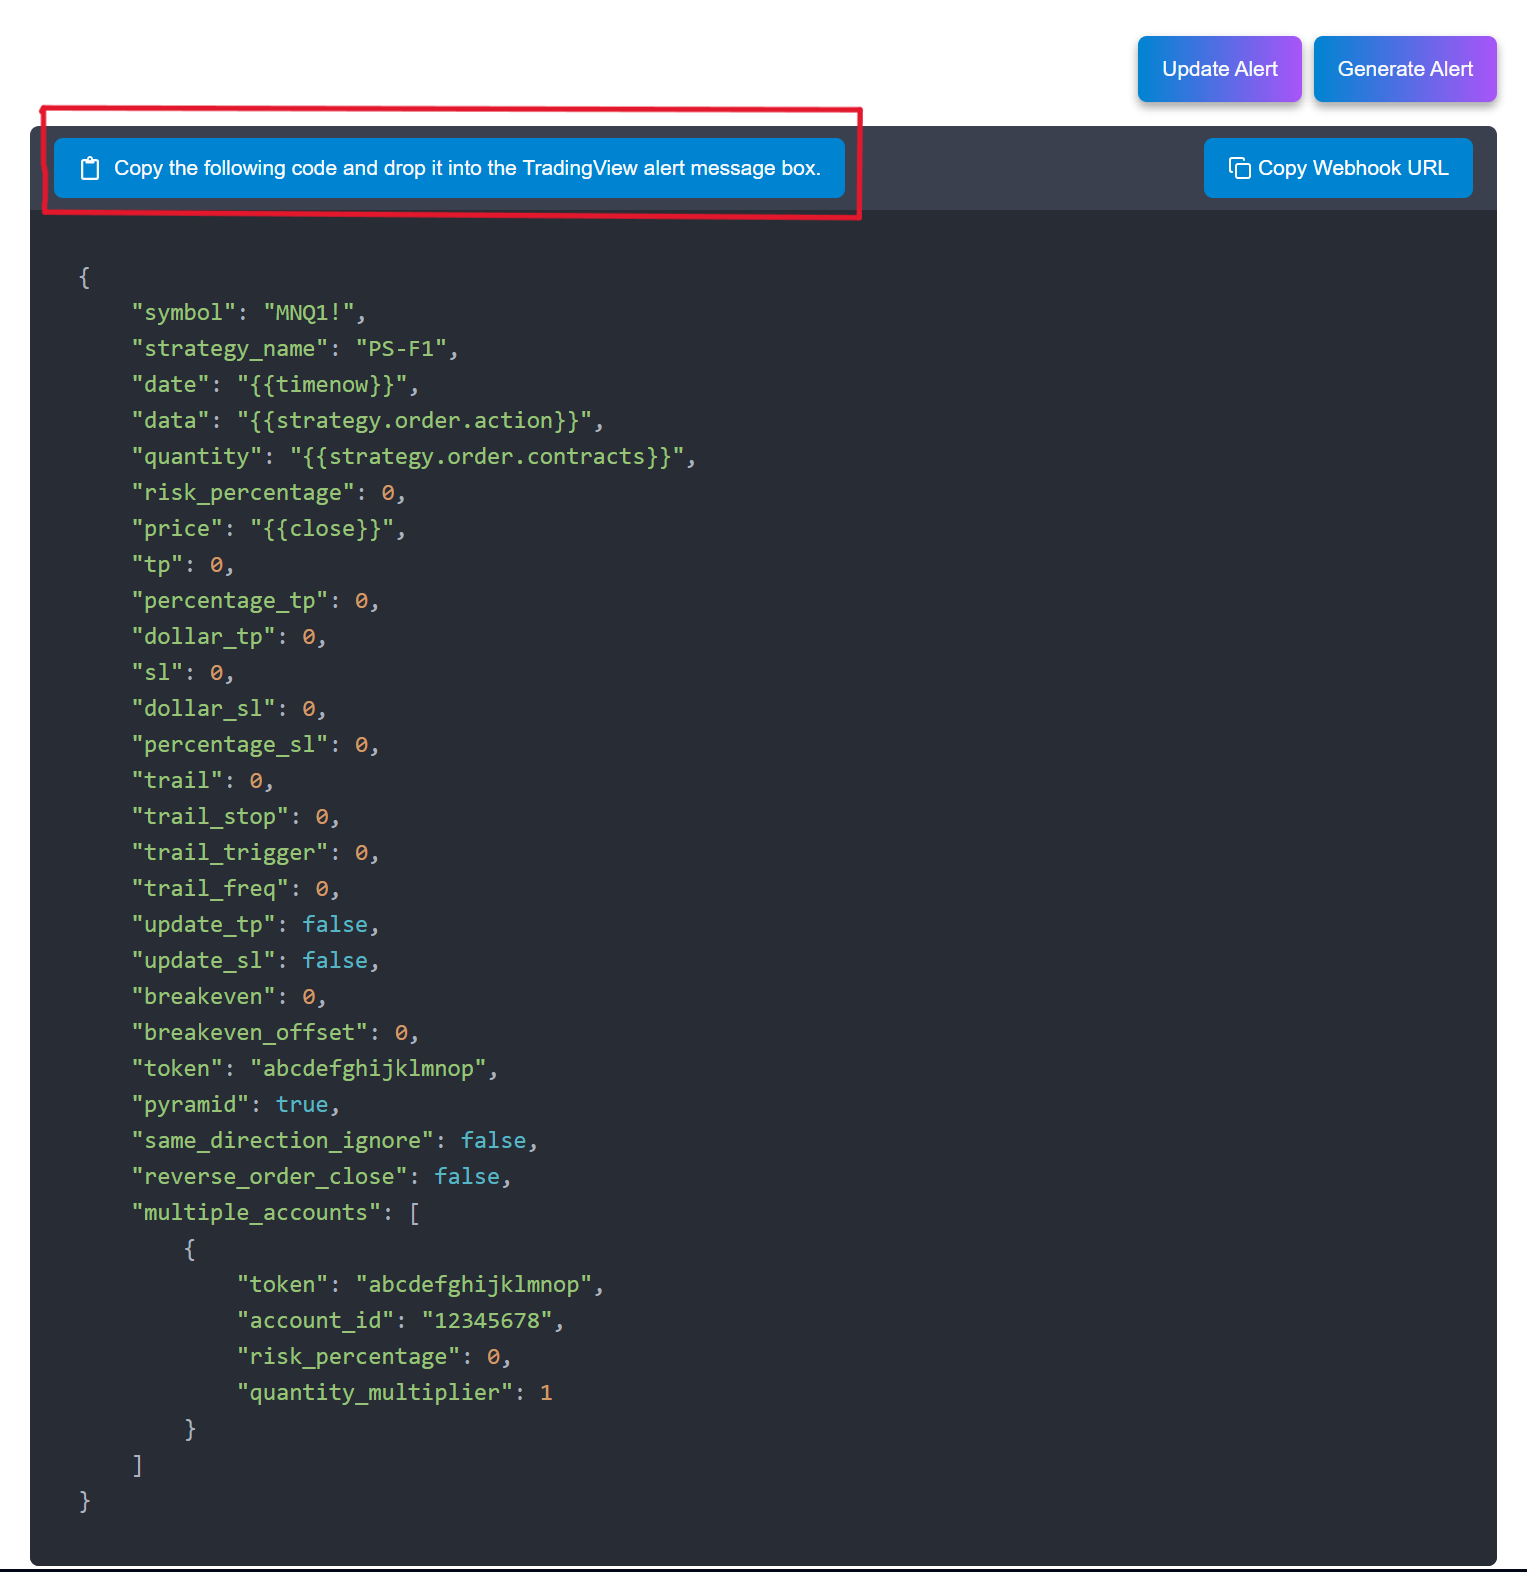
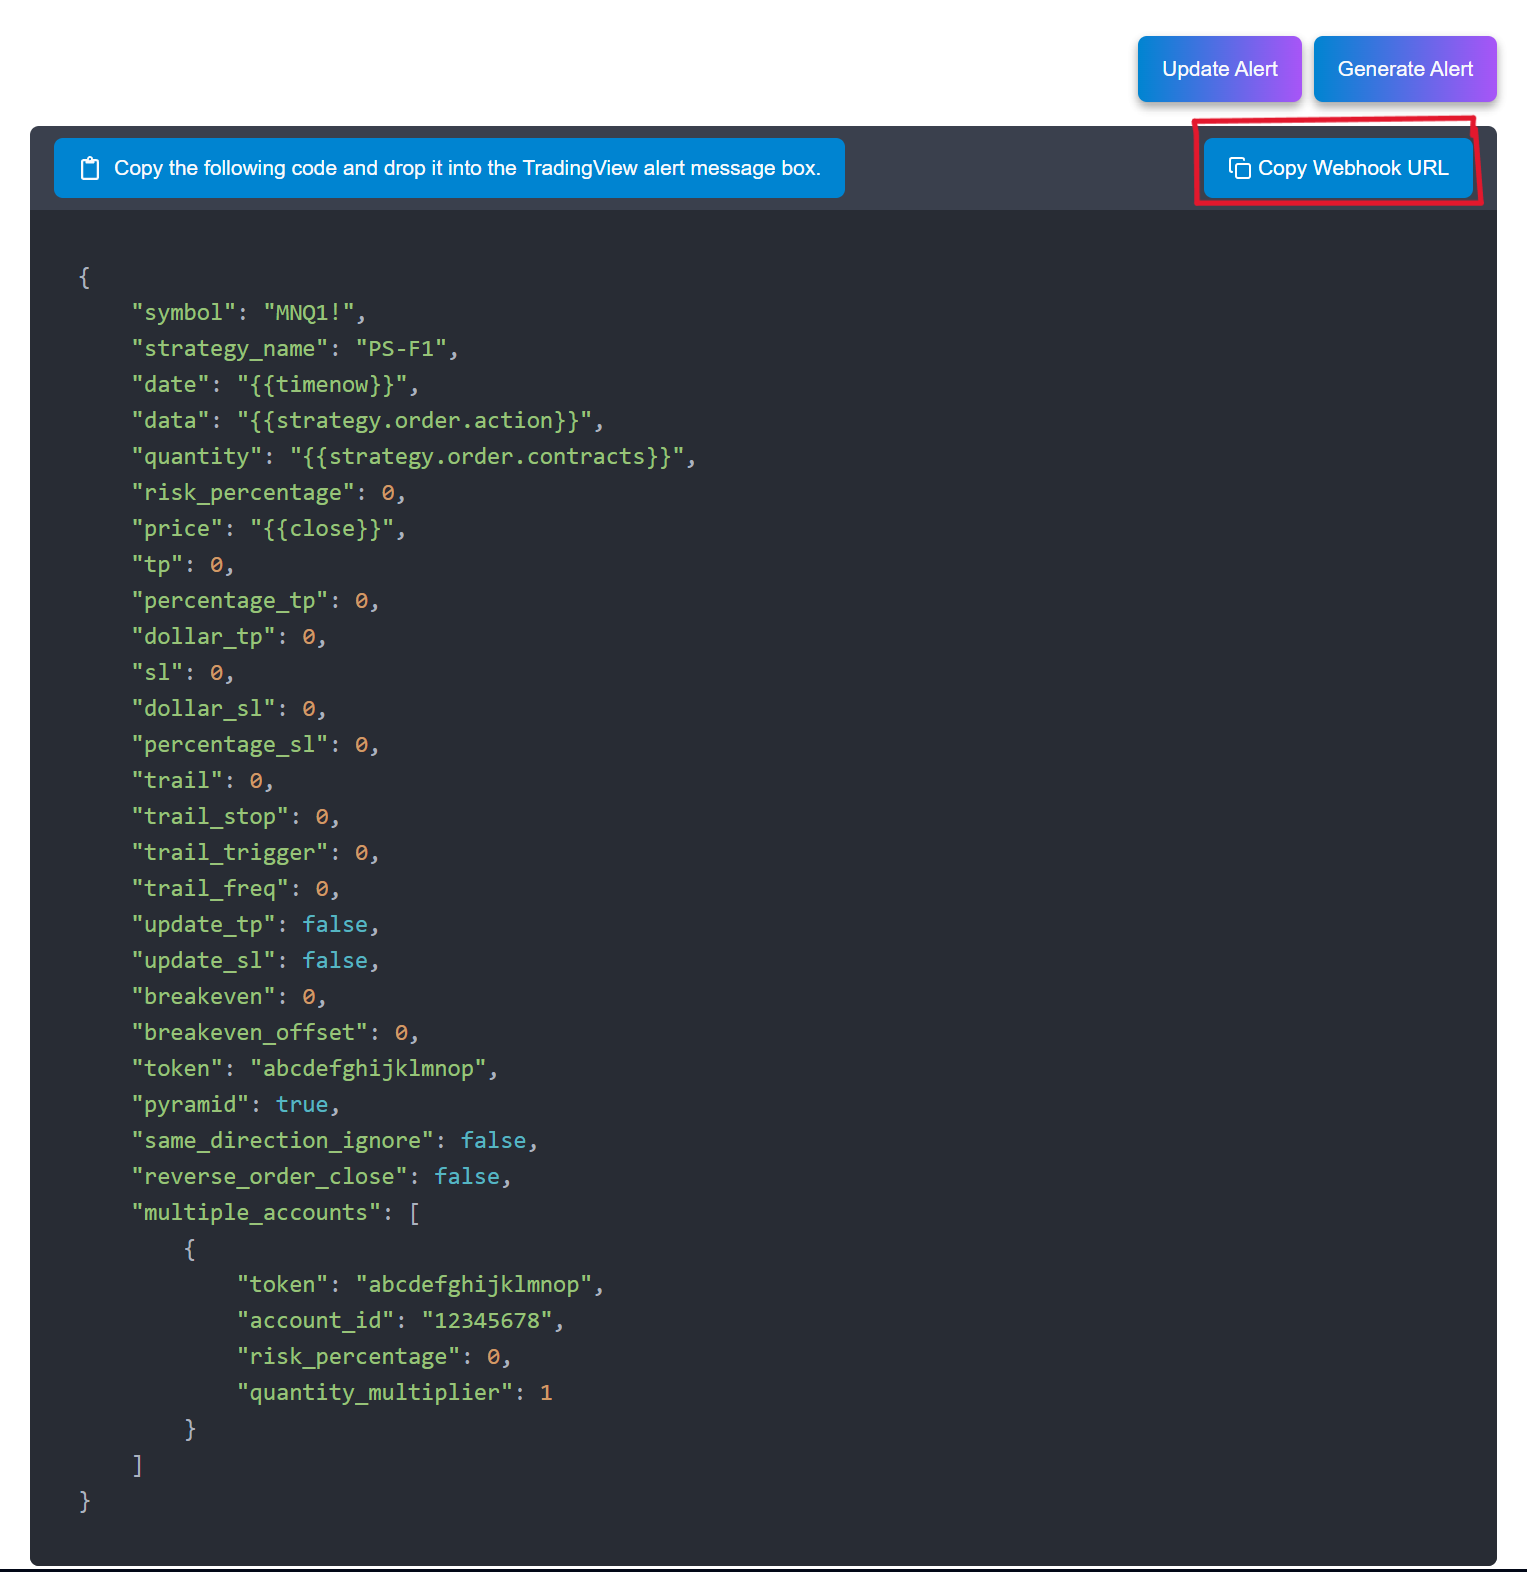
- Open the TradingView / Webhook section and copy your unique JSON message and webhook URL. You'll paste both into TradingView in Step 3.
Configure the webhook alert in TradingView
This is the connection that makes it live. You'll create one alert on the strategy and paste in the code from the bridge you set up in Step 2.
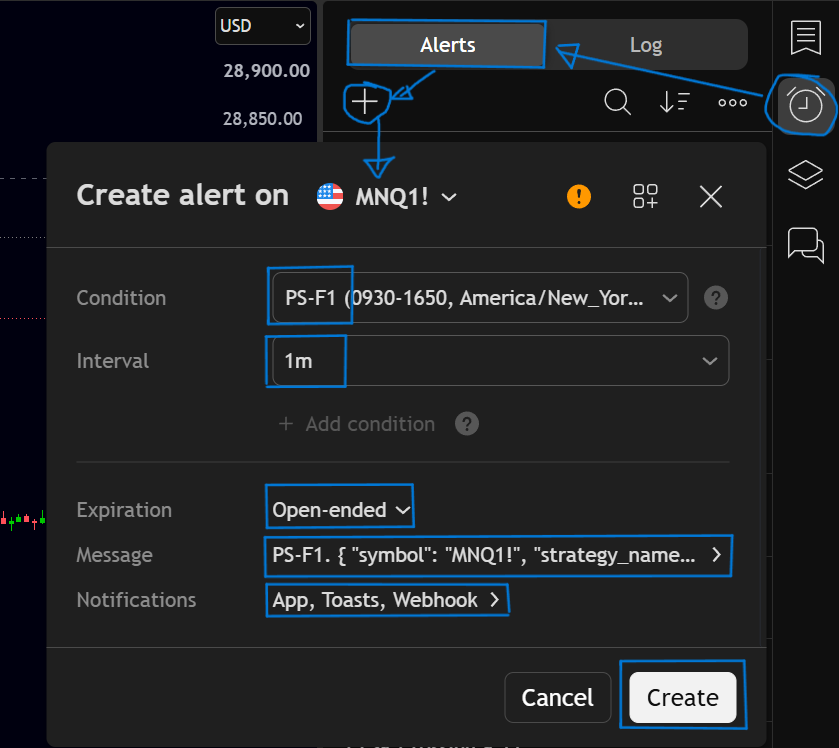
- On the chart with your strategy added, open the Alerts panel (the clock icon on the right) and click Create alert.
- Set the Condition to your strategy (e.g. PS-F1) so the alert fires on its signals — leave it on Order fills and alert() function calls.
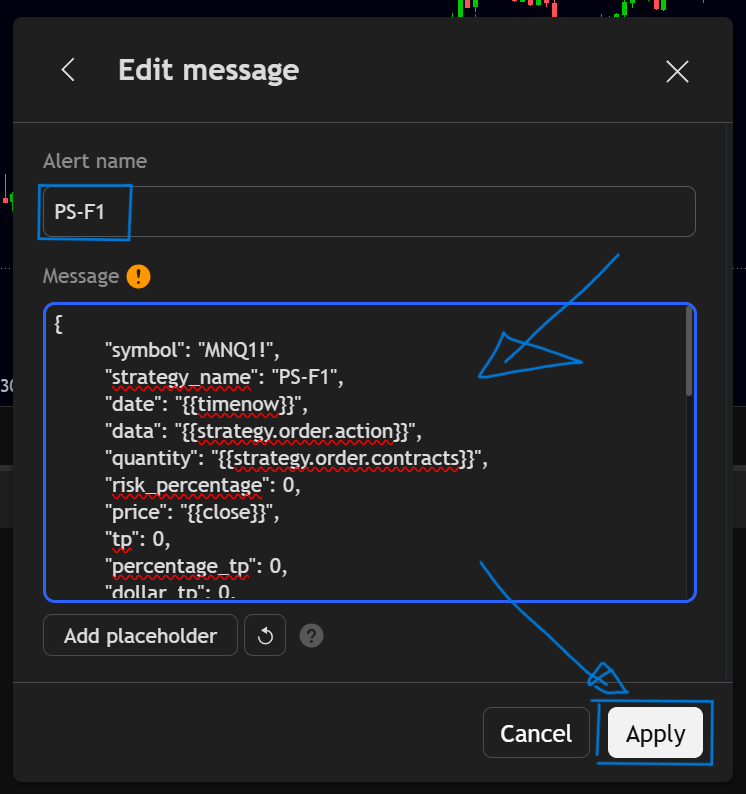
- In the Message box, paste the JSON message code from your bridge.
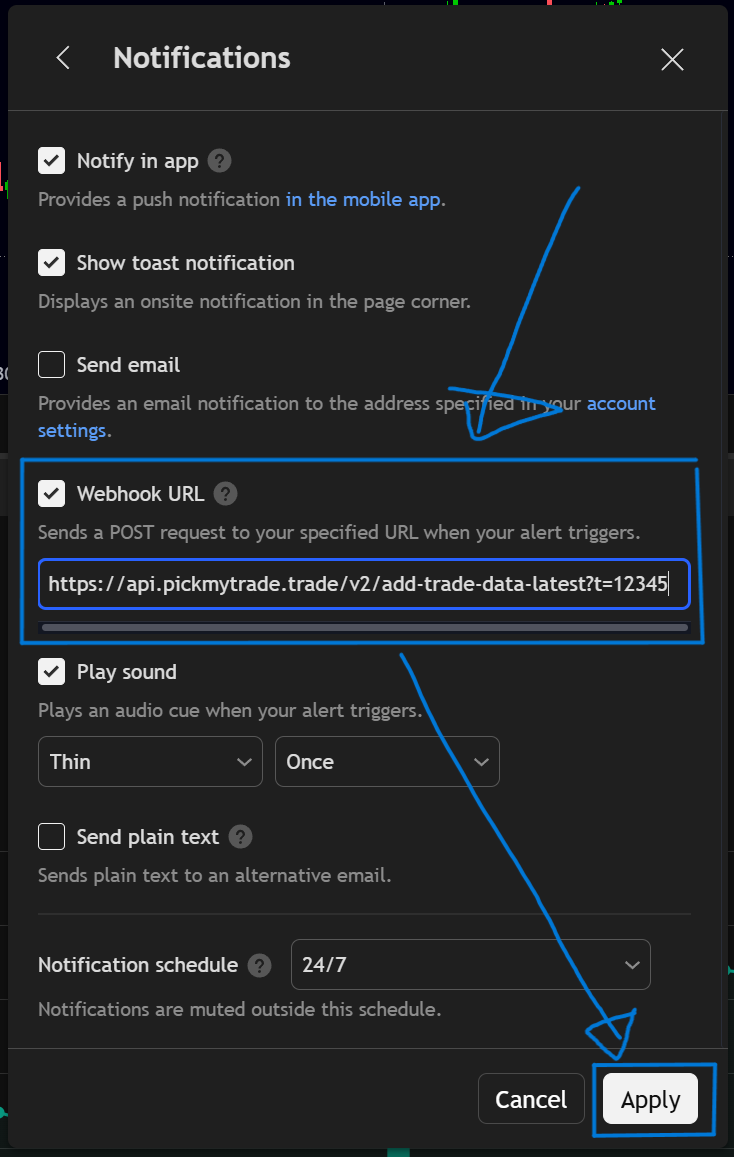
- Open the Notifications tab, enable Webhook URL, and paste your bridge's webhook URL.
- Click Create.